Short answer
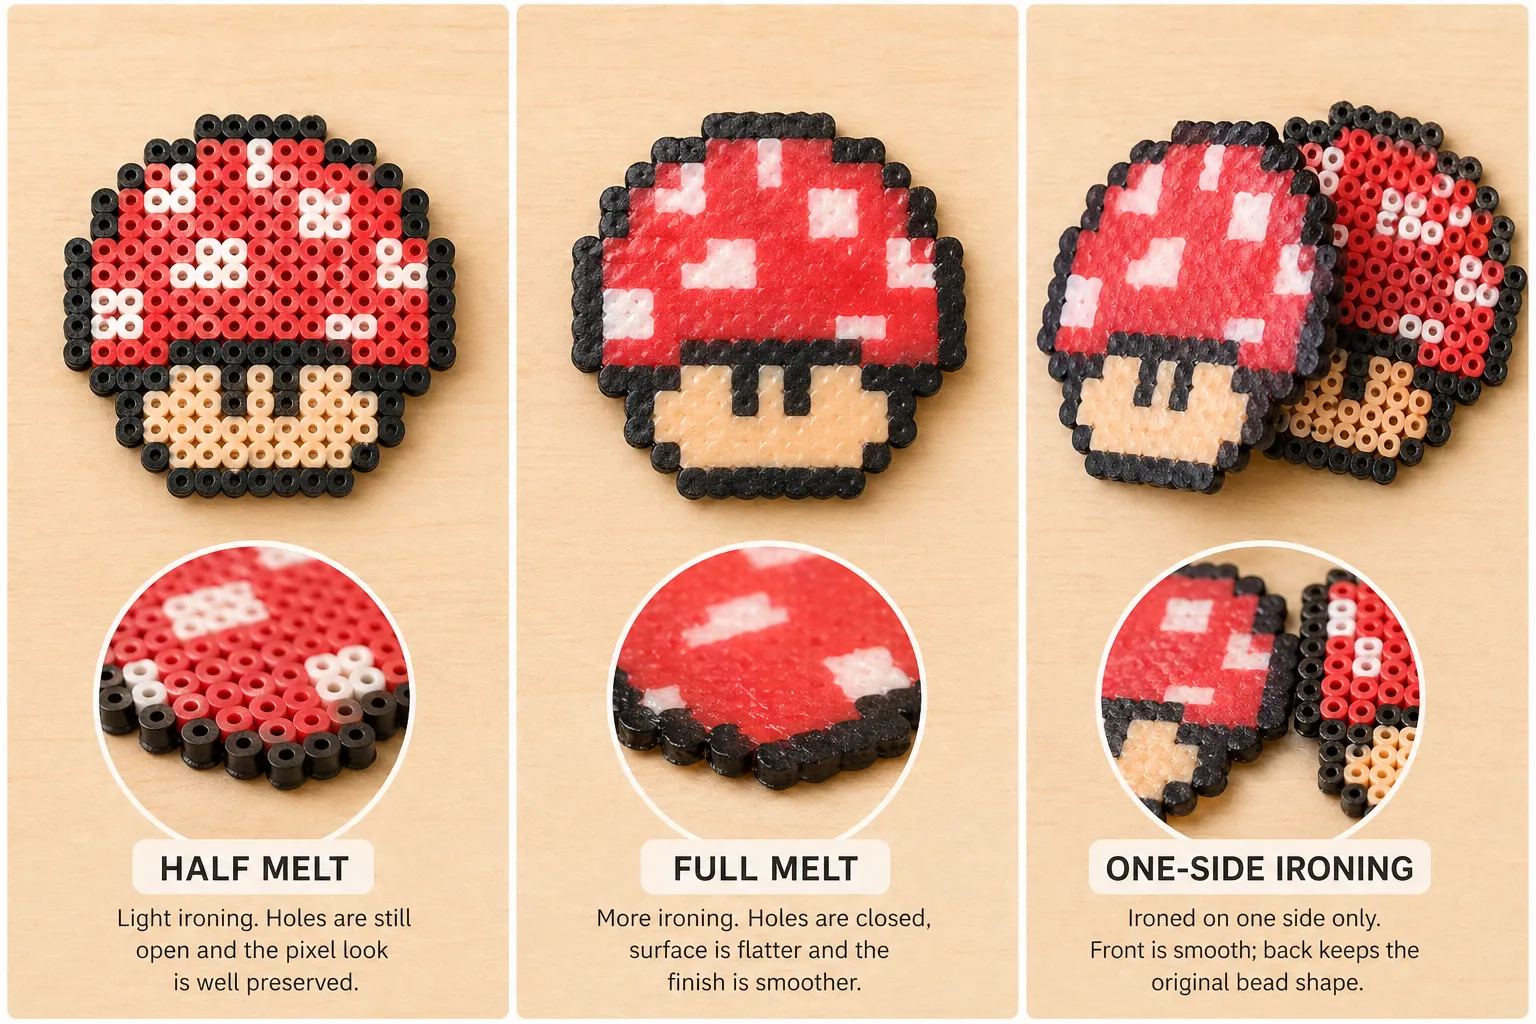
Start with half melt if you want to keep the bead holes and pixel look. Choose full melt if you want a flatter, cleaner surface. Choose one-side ironing if you want each side to have a different finish.
- Half melt is the safest starting point for beginners.
- Full melt gives a smoother finish but demands tighter heat control.
- One-side ironing works best when you want one display face and one textured face.
How the main styles look
Half melt bonds the beads just enough that the center holes remain visible. This keeps the grid-like pixel feeling and is the most recognizable fuse bead look.
Full melt closes the holes much more and creates a flatter, smoother surface. It often looks denser and more polished.
One-side ironing leaves one face more melted while the other still shows the original bead shape, giving the piece a split personality.
Which style should a beginner choose first
- Choose half melt if your priority is a higher success rate.
- Choose full melt if you want a smoother display piece or charm.
- Choose one-side ironing if you want contrast between front and back.
- Avoid aggressive full melt on your first detailed pattern because fine edges can blur.
Common mistakes
Many beginners think full melt just means pressing harder. In practice, the result is driven more by heat, contact time, and movement rhythm than by force alone.
One-side ironing often fails when the piece is flipped too early. If the first side has not bonded enough, the work can shift or break apart.
- Half melt too light: the piece feels loose and fragile.
- Full melt too long: the design softens and small details blur.
- One-side flipped too early: the piece shifts or cracks.