Safest beginner setup
Turn steam off, preheat to a medium-high setting, move the iron slowly over baking paper, do not press hard, and build up the melt in short passes instead of one long pass.
- Use dry heat first. Steam usually makes control harder.
- Short passes are safer than one heavy pass.
- Even movement matters more than force.
How to set up the iron before you start
Most household irons can work for fuse beads as long as they can give stable dry heat. Turn steam off and let the iron preheat at a medium-high setting.
Actual temperatures vary by iron, so do not rely on one exact dial position. Test on a small pattern first whenever you use a new iron.
Movement matters more than pressing down
Once the iron is on the paper, resist the urge to press hard. The goal is to spread heat evenly across the pattern, not crush one spot at a time.
- Move in small circles or short steady passes.
- Give extra attention to thin edges and corners.
- Avoid pausing too long in one place.
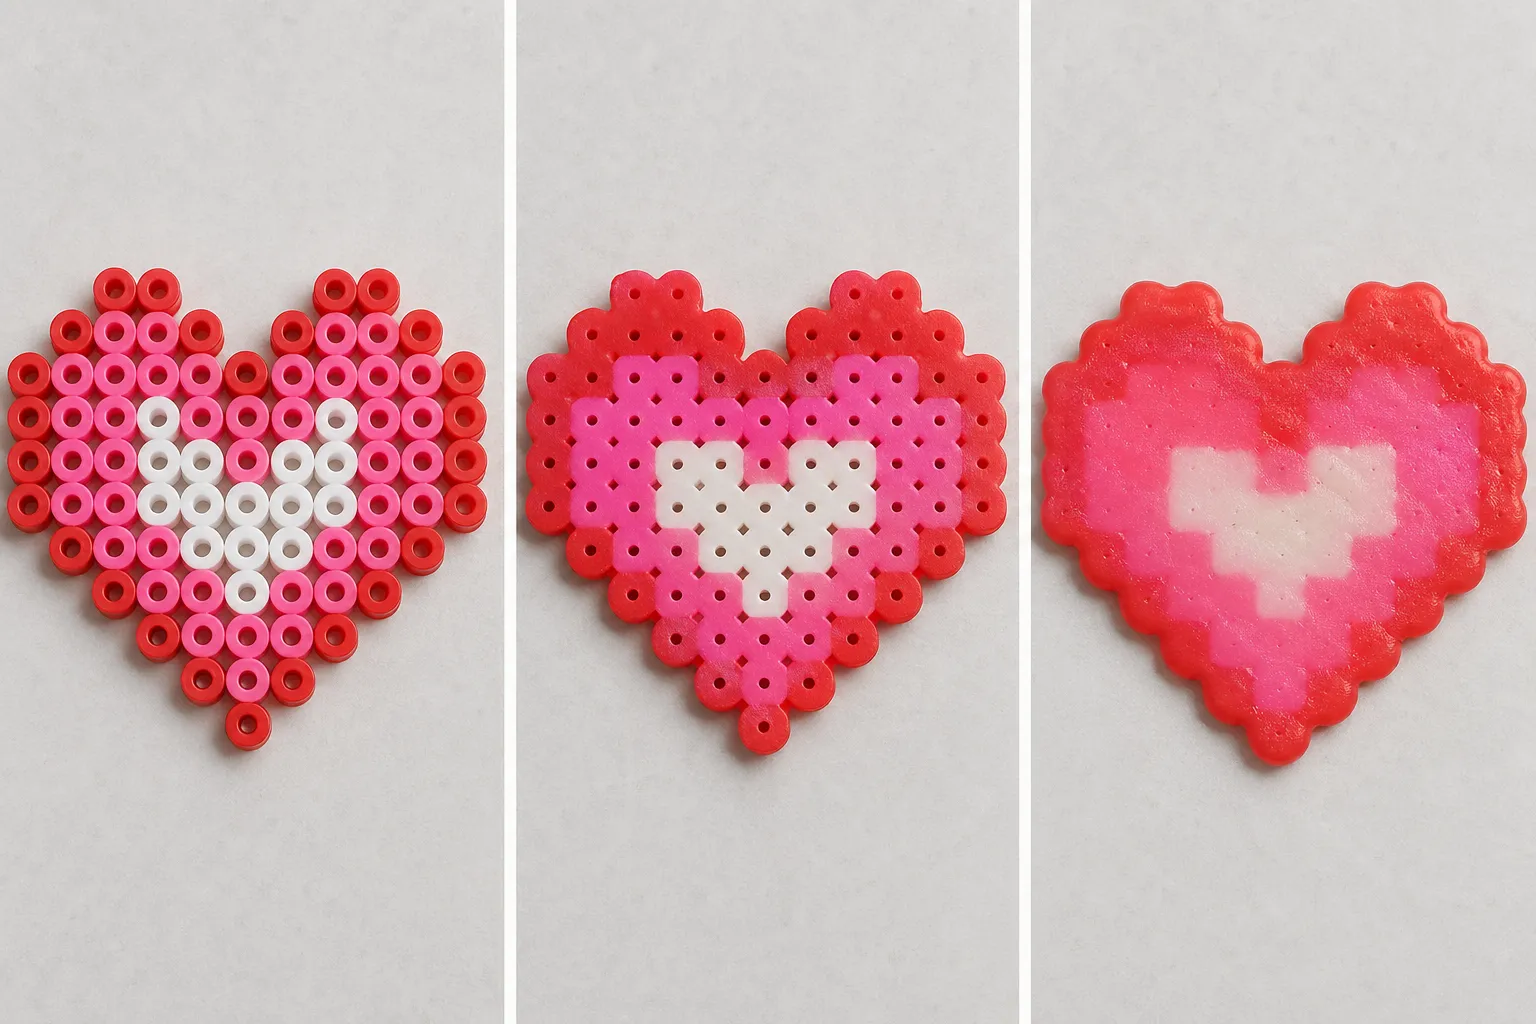
How to judge timing without overdoing it
It helps more to learn what to look for than to memorize a fixed number of seconds. Through the paper, watch for bead edges starting to connect and the holes beginning to shrink.
For half melt, stop once the beads are holding together. For fuller melts, add time gradually instead of trying to finish everything in one pass.
- Start short, then add a second pass if needed.
- Increase time in small steps only.
- On larger pieces, check multiple regions instead of just the center.
Four mistakes to avoid
- Leaving steam on and making heat less predictable.
- Pressing hard to go faster and blurring details.
- Trying to finish in one long first pass.
- Melting the middle well but leaving the outer edges weak.