Practical answer first
If your piece spans multiple boards, has long thin sections, or looks risky to lift directly, use the tape method. It is not about being advanced. It is about keeping transfer and flipping stable.
- Large pieces often fail during transfer, not during the actual melt.
- The tape method helps most with multi-board work and fragile shapes.
- Flattening large pieces works best when you think in zones, not just the center.
When to use the tape method
If the piece crosses more than one board, or if it is narrow and fragile enough that lifting it feels risky, the tape method usually gives you a much safer transfer.
Small, dense, single-board pieces often do not need this extra step. The real question is whether the design will shift or break apart when moved.
- Use it for multi-board pieces.
- Use it for long narrow shapes and weak bridge sections.
- If it is your first large piece, choose stability over speed.
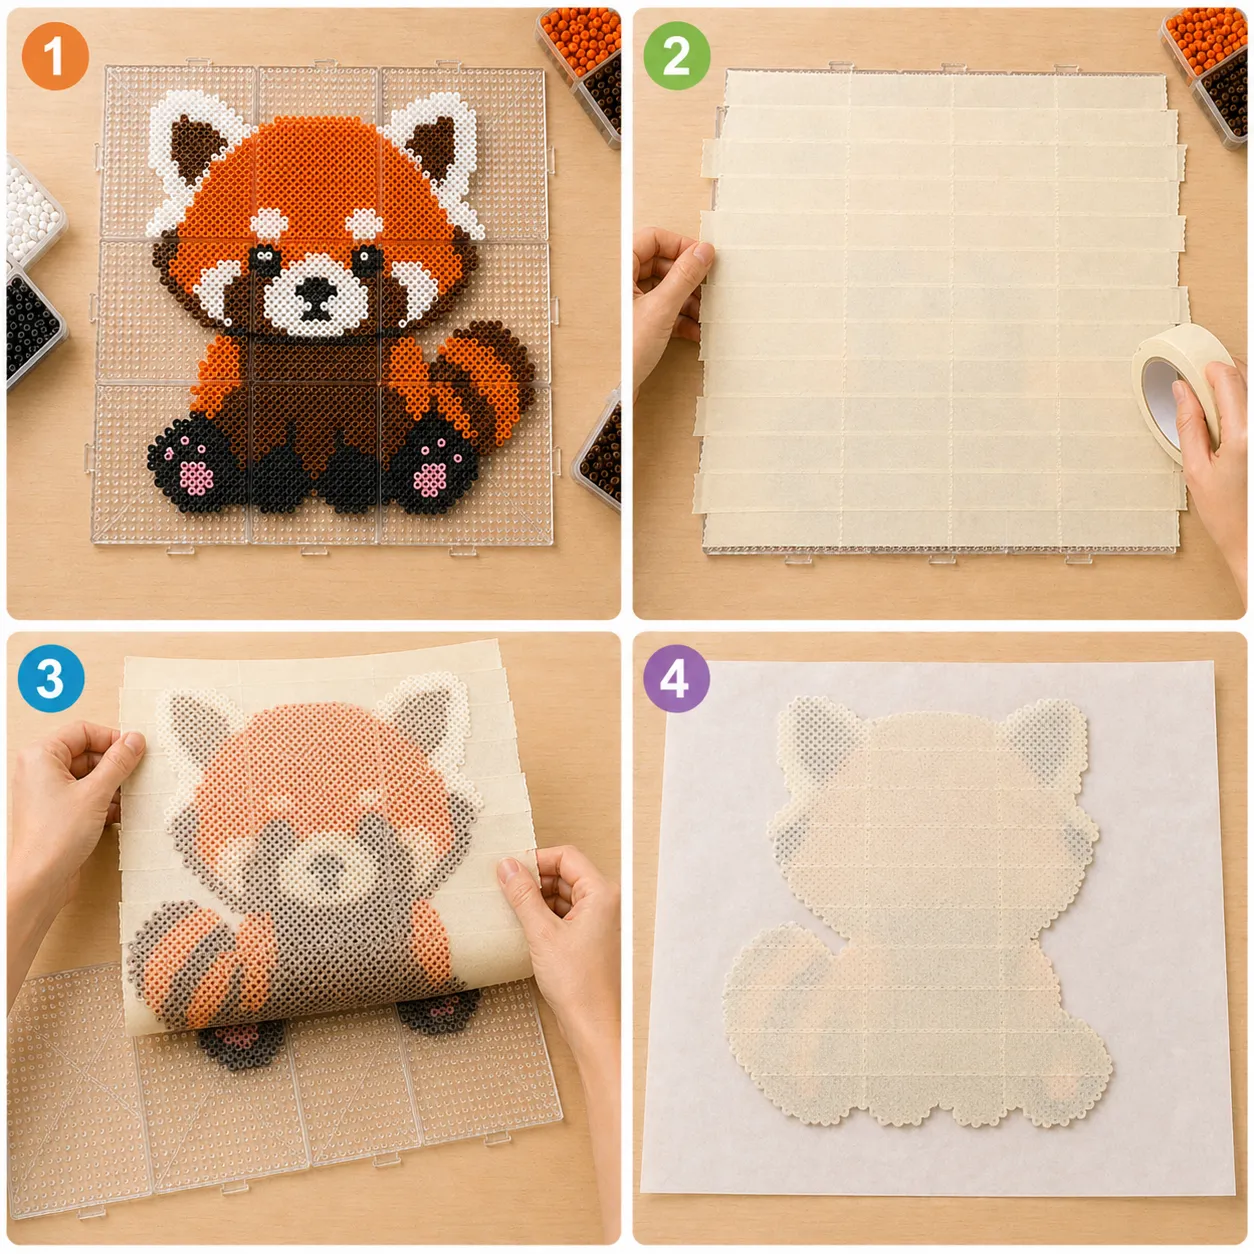
A basic order for multi-board transfer and flipping
A common workflow is to finish bead placement on the boards, tape the surface, press the tape down gently, flip the whole work, remove the pegboards from the back, then start ironing from that side through paper.
On multi-board work, the joints between boards deserve extra attention before you flip. Those seam lines are often the weakest part of the whole piece.
- Do not tape only the middle. Secure edges and seams too.
- Prepare the flat surface and paper before flipping.
- Use the first pass to create structure, not to force the final finish immediately.
Where large pieces fail most often
Many failures happen while removing the pegboards or shifting the taped piece to the ironing surface. If you pull too quickly, beads can lift with the board and seams can shift.
Another common issue is melting the center well while outer areas stay weak, so the piece starts to separate or curl once you handle it.
- Edges were not taped well enough and open first during the flip.
- Board seams were not stabilized and split under stress.
- Heat was focused on one area instead of spread across the whole design.
How to flatten a large piece more evenly
A large piece should cool as much as possible in one flat plane. That means using a broad flat weight and checking edges and long extensions instead of assuming the center is enough.
It also helps to treat flattening as part of the main process rather than an afterthought once the piece has already started to bend.
- Use a flat broad weight, not just a heavy object in the middle.
- Inspect edges, seams, and long ends separately.
- Build flattening into the normal workflow for large pieces.