The main pattern to remember
Most ironing problems are not solved by pressing harder. Turn steam off, start with shorter passes, spread heat evenly, and only add more melt once the structure is already stable.
- The riskiest move is usually overdoing the first pass.
- Edges, corners, and bridge sections fail earlier than the center.
- A piece can look fine right after ironing and still fail later during flipping or cooling.
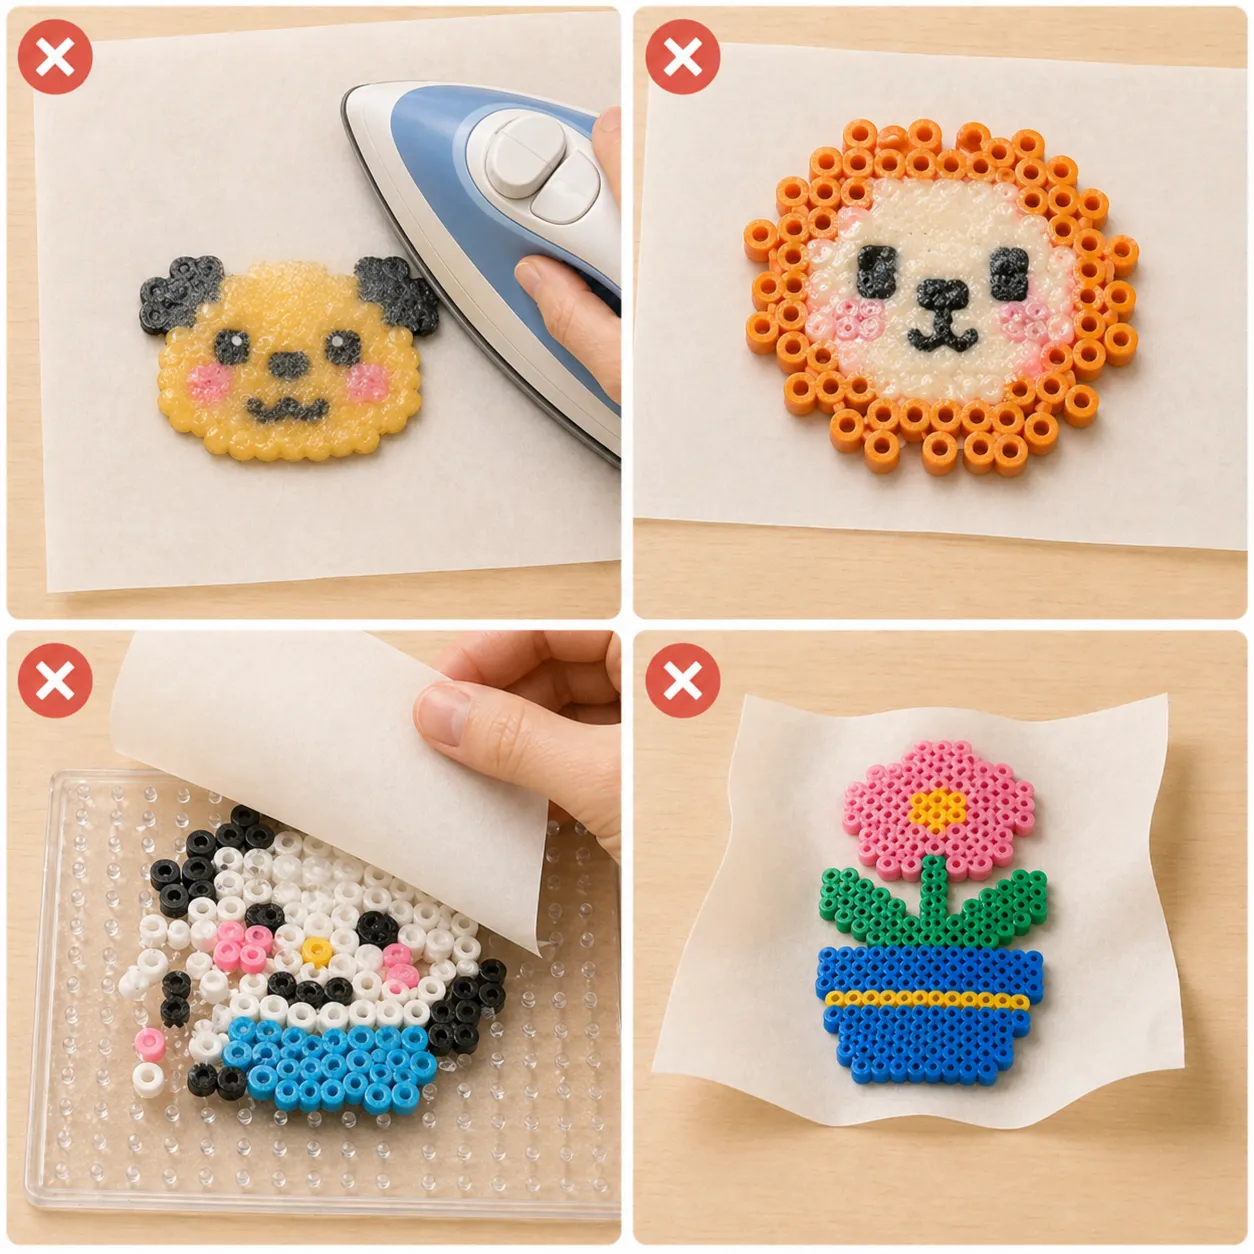
Mistakes 1 to 3: rushing the heat
The first category happens early: too much heat, too long on the first pass, or pressing hard to go faster. That is how details blur before the structure is even ready.
This category also includes forgetting to turn steam off or starting before the iron has stabilized, which makes the output inconsistent from one moment to the next.
- Mistake 1: making the first pass too long and over-melting details.
- Mistake 2: leaving steam on and making heat less predictable.
- Mistake 3: starting before the iron has reached a steady state.
Mistakes 4 to 5: melting only part of the piece well
Another common pattern is thinking the work is ready because the center looks bonded, while edges and narrow sections are still weak.
Large pieces make this worse because uneven heating becomes much more visible when you flip or flatten them.
- Mistake 4: checking only the middle and ignoring edges or join points.
- Mistake 5: not thinking in zones on larger pieces.
Mistake 6: flipping at the wrong time
Flip too early and the first side has not bonded enough, so the design shifts or breaks apart. Flip too late and the first side may already be more melted than you wanted, leaving less control for the second side.
This matters even more for one-side ironing and large pieces.
Mistake 7: acting like the job is done once the iron comes off
Many pieces fail after ironing, not during it. They curl while cooling, loosen at the edges, or reveal weak spots once handled.
That is why cooling and flattening are part of the core process, especially for larger, flatter, or more heavily melted work.