Short answer
The safest way into 2.6mm mini beads is not jumping straight into a big complex piece. First decide whether you actually want the slower pace, then tune your tools and workspace, and finally start with a small clear design.
- Mini beads are a workflow upgrade, not just a material swap.
- Smaller beads reduce tolerance in placement, flipping, and ironing.
- Your first mini project should be simple and compact.
- If your 5mm process is still unstable, strengthening that first is usually easier.
Decide whether mini beads fit where you are right now
Mini beads fit best when you already know that you enjoy small detailed work and are willing to move more slowly. If your bead placement, ironing, and flattening rhythm still feels fragile at 5mm, shrinking the size often multiplies every source of friction at once.
That does not mean a beginner can never start with 2.6mm. It means you should go in expecting tighter tool, patience, and control demands.
How your tools and workspace need to change
Once the beads are smaller, desk stability, lighting, tweezers, and board feel matter much more. Many people think they are bad at 2.6mm when the real issue is that they are still using a 5mm-style environment.
If you keep misreading colors, struggling to grip beads, or nudging finished areas out of place, the next improvement is often your setup, not a different pattern.
- Stabilize the desk and lighting before chasing harder patterns.
- Tweezers matter more at 2.6mm than they do at 5mm.
- Mini beads react more strongly to vibration and rushed movement.
- Leave yourself more time than you would on a standard-bead project.
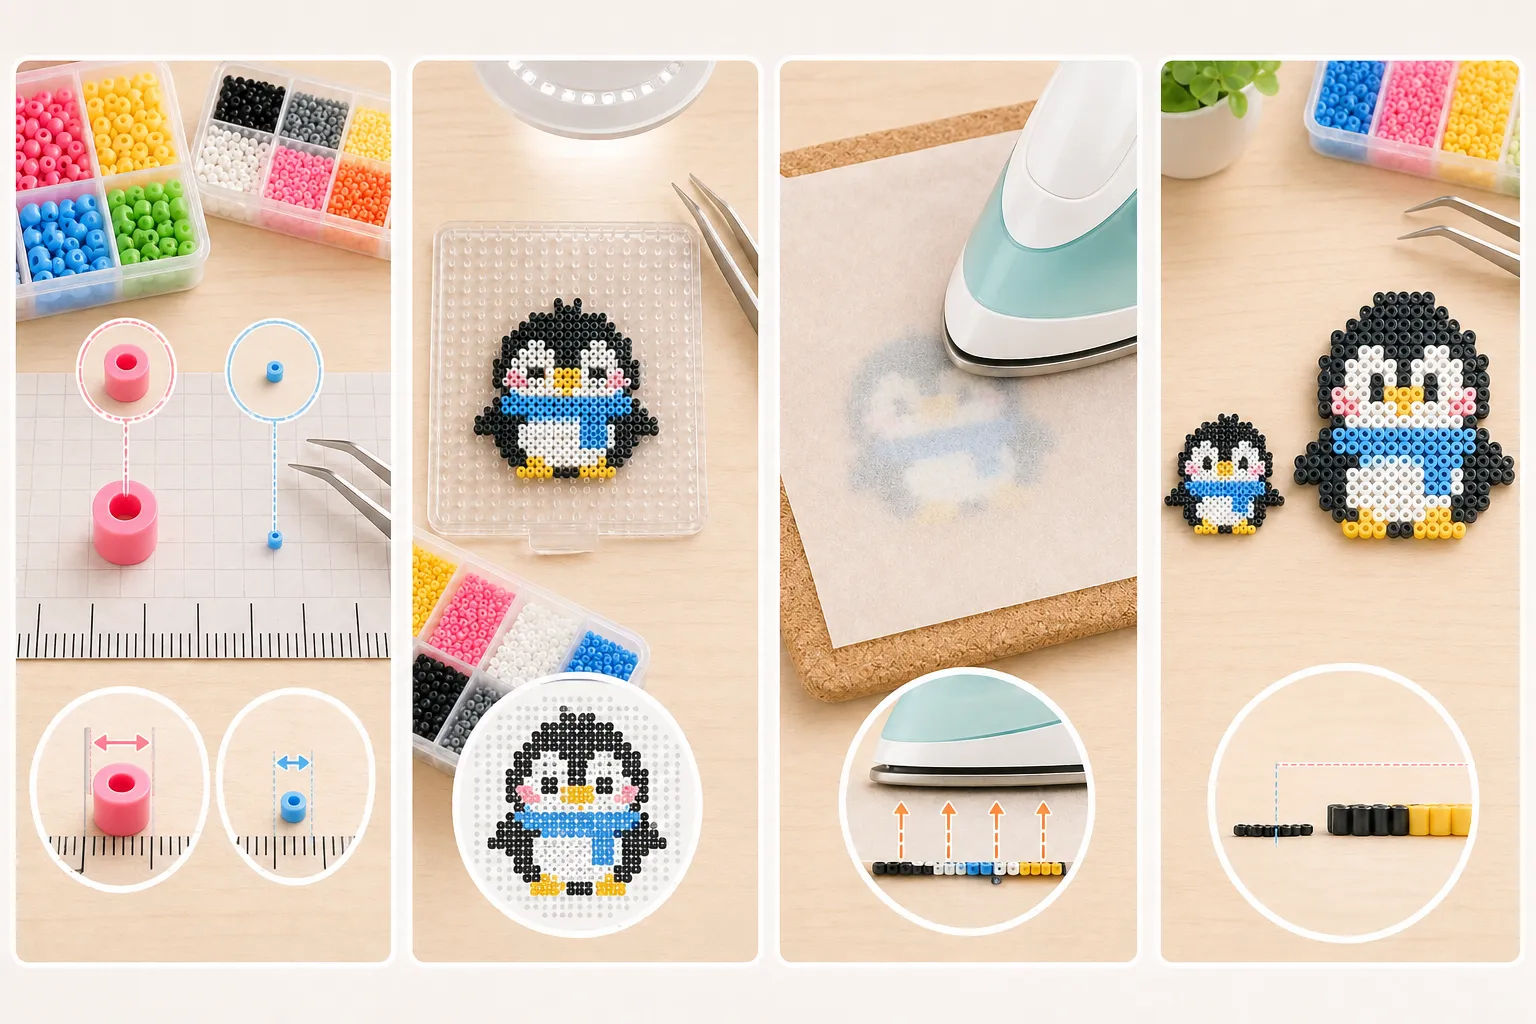
What to make first with mini beads
The best first mini projects are small portraits, icons, badges, or compact animals with clear edges and limited colors. What you are training first is control, not ambition.
If you begin with a difficult pose, a photo conversion, or a dense character full of diagonals, it becomes much harder to tell whether mini beads are the issue or the pattern itself is just too hard.
- Start small instead of chasing a large detailed showpiece.
- Limited-color designs with clean edges are ideal practice.
- First learn to place, read, and fuse mini beads reliably.
Why mini-bead ironing feels stricter
At a smaller scale, heat affects detail faster, so your dwell time, movement path, and reheating rhythm need to be more controlled. Mistakes that 5mm sometimes absorbs become obvious blur or distortion much faster at 2.6mm.
That is why mini beads reward short observation cycles and gentle corrections instead of one long pass done by instinct.
- Build the melt gradually instead of forcing it quickly.
- Detailed mini designs need edge awareness as much as center awareness.
- Barrier material and iron pairing become more noticeable at this scale.
Common mistakes
- Treating mini beads as a simple shrink version of the 5mm workflow.
- Making the first project too large.
- Upgrading bead size without upgrading tools or workspace.
- Adding more and more colors just because the scale can technically hold them.
FAQ
Can a beginner start directly with 2.6mm mini beads?
Yes, but it demands more patience and a better setup. Many people have an easier time learning the full process with 5mm first and then moving down in size.
Do mini beads require a mini iron?
Not always. What matters most is whether you can control heat and coverage consistently at the smaller scale.
What is a good first mini-bead project?
Choose a small, clear design with limited colors, such as a simple portrait, symbol, badge, or compact animal face.
Why can I handle 5mm but struggle with 2.6mm?
Because 2.6mm exposes weaknesses in placement, lighting, tools, desk stability, and heat control much more quickly.