🧩 What are Perler Beads?
Perler Beads (also known as Hama beads or fuse beads) are a globally popular craft art. Small hollow plastic cylinders are placed on a pegboard to form pixel-art patterns, then fused together using baking paper and a household iron into a solid, tangible artwork.
Originally invented as a children's educational toy, it has evolved into a fantastic medium for pixel art enthusiasts. You can recreate classic game sprites or design original cyber, anime, or casual original characters (OCs) just like we do at Tiny Bead Studio.
The charm lies in its low barrier to entry. No drawing skills needed — if you can read a grid, you can turn digital pixels into physical objects.
🛠️ Essential Tools
To start in real life, you need these basic tools (easily found in starter kits online):
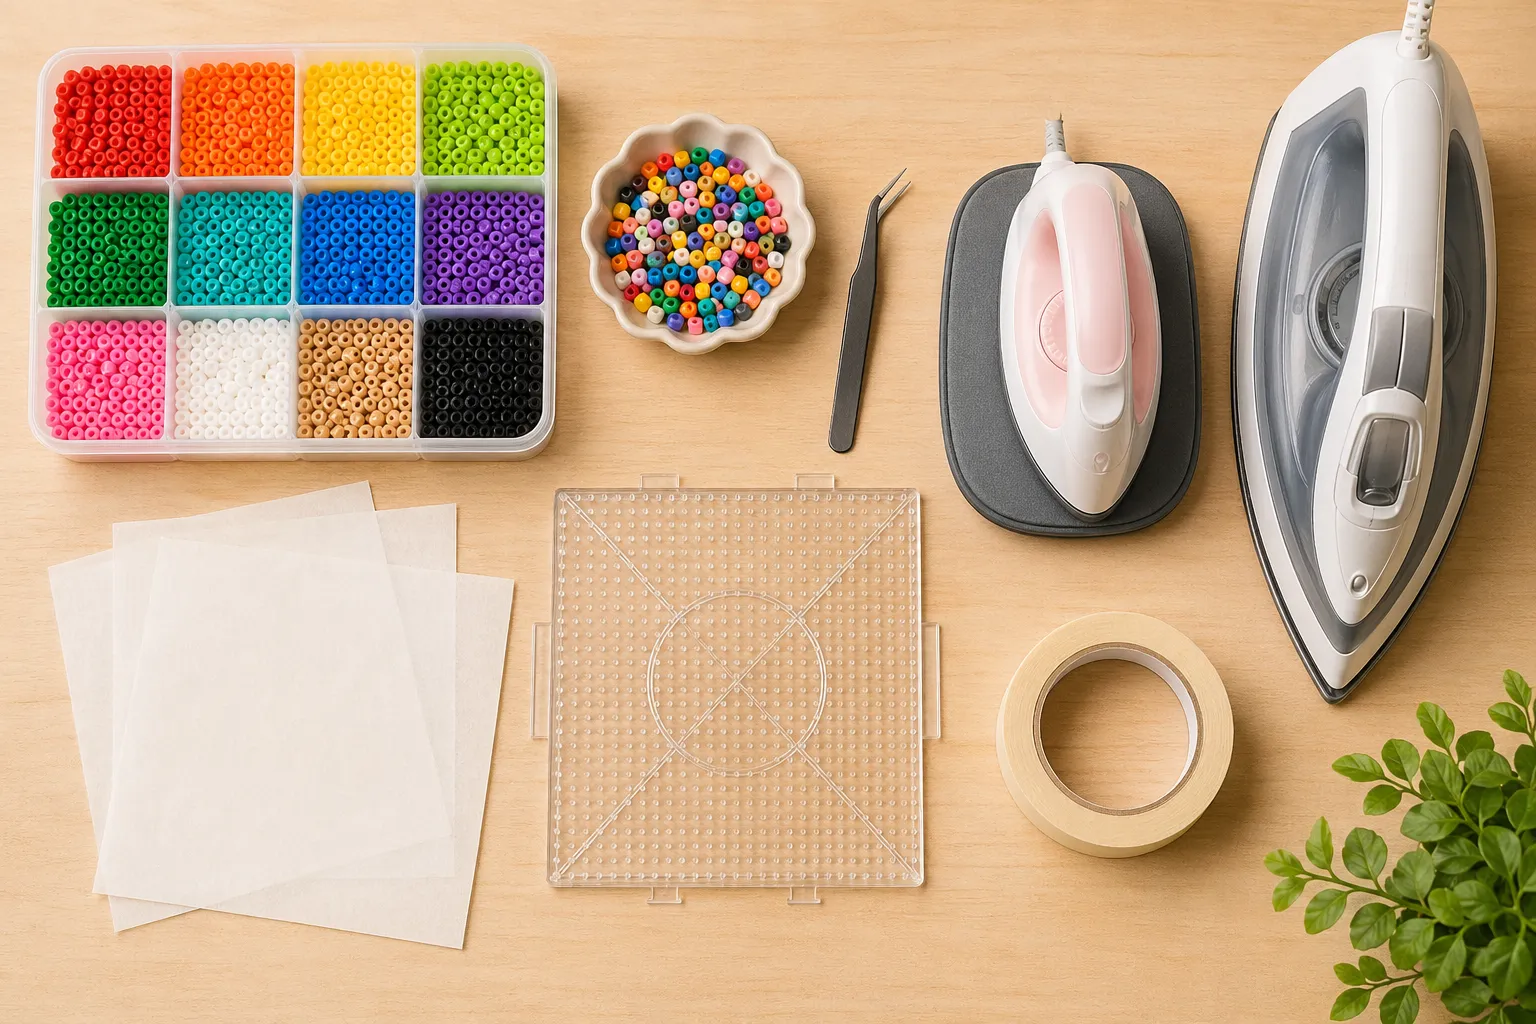
- Beads: 5mm (starter friendly) or 2.6mm (for detailed keychains).
- Pegboard: A clear plastic grid board. Interlocking large squares are best.
- Tweezers: For precisely picking and placing the tiny beads.
- Ironing/Baking Paper: Heat-resistant paper to protect your iron. Never use plastic wrap or A4 paper!
- Household Iron: Any flat iron with temperature control (no steam).
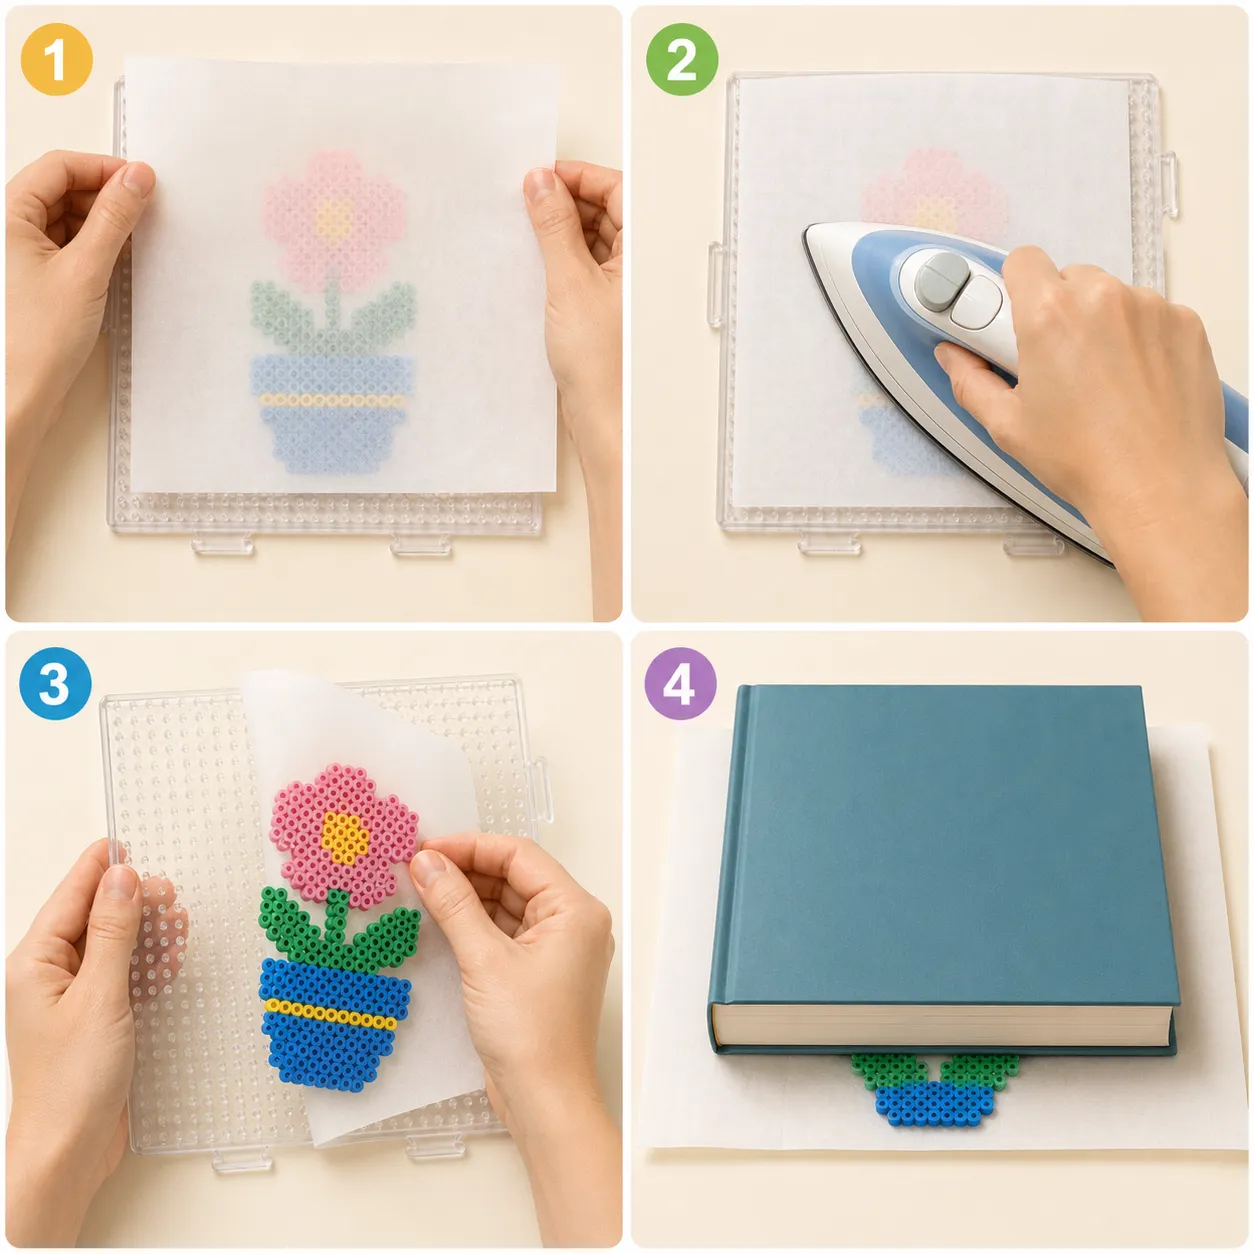
📝 Process: From Pixels to Reality
Step 1: Get a Template
Find pixel art templates online or use our Tiny Bead Editor. One grid unit = one bead.
Step 2: Placing Beads
Place the clear pegboard over your printed template and use tweezers to place matching beads onto the pegs.
Step 3: Ironing
Cover the beads with baking paper. Use a medium-heat iron (no steam) in gentle, circular motions for 15-20 seconds until they melt and fuse.
⚠️ Tip: Ironing is the hardest part! Too little time = fragile. Too much time = melted mess. Our Gacha animation simulates this very process.
Step 4: Cooling under Weight
Flip it over, iron the back, then immediately place it under heavy books for 5-10 minutes to prevent warping as the plastic cools.
💡 Advanced: Ironing Styles
Different ironing methods yield different visual results — which we simulate in our digital gallery:
- Normal Melt: Beads fuse but holes remain open. Classic, pixelated mechanical look.
- Flat Melt: Ironed longer until holes close completely. Looks flat and glossy like an acrylic stand.
- Single-side Melt: One side flat, the other side untouched cylinders for a 3D relief texture.
- Fabric Texture Melt: Using textured heat-resistant cloth leaves a canvas or denim-like matte finish.
Look up specific problems next
These focused guides work best once you start making a real first piece and need answers fast.
Judge pattern difficulty first, then decide whether to edit a reference or build your first pattern from scratch.
Settle size and detail in the editor first, then move into pegboard placement and ironing with much less risk.
Choose the first project that gives you the best chance of finishing cleanly, not the one with the highest emotional ambition.
Control the heat well and you remove most beginner ironing mistakes before they happen.
Pick the brand route that fits your first workflow, not the one that only looks strongest on paper.
Figure out whether the problem is heat, time, movement, or weak structure before you keep pressing harder.
First decide whether the board is only slightly distorted or already unstable enough to affect bead placement.
Many pieces that look fine at first only warp later while cooling. This is the part that prevents that.
Start with a small, sturdy design. That is usually the cleanest path to a successful first keychain.
Coasters look simple, but real usability depends on surface area, flatness, and even support.
A good magnet is not just a cute design with a magnet stuck on later. The back surface and balance matter too.
Learn when to split work across boards and when the tape method is the safer move.
Mini beads are not just smaller materials. They demand a finer workflow too.
The real goal is not copying the photo perfectly. It is protecting silhouette, value structure, and readability at bead scale.
Useful estimation is not about perfect precision. It is about knowing early whether the project is already larger than your current comfort zone.
Judge the scale, board layout, and flipping risk first, then decide whether the project is worth building at your current level.
Choosing the right bead size early matters more than chasing complexity too soon.
Classify the failure first, then decide whether the piece should be repaired, stabilized, or abandoned instead of making the damage worse.
Choose the end result first, then choose the melt style, edge treatment, and support strategy instead of realizing too late that the piece was finished for the wrong use.
Avoiding the most common failure points is often faster than memorizing more advanced tricks.
Set color roles and value structure first, then decide whether more colors are actually helping instead of filling the design with near-matches.
Set the light direction and major forms first, then decide where shadows and highlights actually belong instead of dropping darker colors into every empty space.
Treat 3D fuse beads as a structure and assembly problem first, then decide the styling and detail level after the build logic makes sense.
Neither option is always better. The better one depends on what you actually make.
The layer between the iron and the beads changes both feel and finish more than many beginners expect.
Compare the finished look first, then choose the style for your first fuse bead piece.